How to Glue Brass to Wood
The obvious choice for gluing brass to wood includes epoxy resin, super glue, and silicone adhesive. Choosing the right adhesive in this application will also offer a better advantage for curing times, strength, and flexibility depending on the adhesive chosen.
If there is any kind of flexing involved, an adhesive such as silicone is better than other glues for metal. In that respect, epoxy offers longer and stronger adhesion for several years. But if time is of the essence, super glue will be an alternative choice for last-minute adhesion that works just fine.
Because wood is porous, certain glue will present a surface that soaks up too much glue and will need prepping. Other times, a surface being glued needs to be clamped so the two pieces aren’t slipping off while curing. This guide will help give pointers on how to prep and glue brass to wood with suggestions on how each adhesive will work best.
Which Glue Should You Use For Brass To Wood?
Most glues that work on aluminum and wood will also work well for brass. Not many types of glue work on both brass and wood but here are three that we have tried and tested to work for different applications:
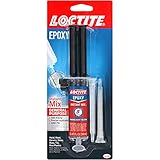
Epoxy Resin
Using epoxy resin to glue rubber to metal is a good option when there is plenty of time to allow the epoxy to completely cure. The resin is mixed in a two-part mixture and then applied to one surface and then attached to the other. It must be held in place until it cures using clamps or anything that holds these two together in direct contact with one another. It’s also good to use if there are large or small surface areas to cover.
Because the epoxy takes the longest among these adhesives, the chemical curing must be completed so the adhesion is 100%. This can often take anywhere from 3 hours to 24 hours for a completed cure time. Epoxy also works when gluing wood to other metals.
Silicone Glue
Silicone glue is a single-component adhesive that is used for applications where brass needs to bond with the wood. Even when applied in a thick bead, it will cure to form a flexible adhesion that will last for long-term usage. It’s not the same as other silicone caulking, so always look for brands that are specifically sold as silicone adhesive. Various silicone brands sell these in small tubes or similar to regular caulking tubes.
This adhesive is best when there is enough time to allow the silicone to cure naturally for a day. The added solvent inside allows enough work time but dissipates slowly allowing the silicone to totally solidify.
Superglue
A faster approach to securing brass to wood is from using super glue since the adhesion is instant between flat pieces. For rounded brass tubing, it will be handy to add filler to fill in gaps around the tube. Great care needs to be practiced as some types of wood can absorb the superglue including balsa wood or lightweight varieties. While this adhesive is faster than other methods, superglue does not flex at all, making glued pieces prone to crack.
There is very little preparation for brass to wood, but more attention to being accurate will be required when attaching them. Removing a piece that did not attach correctly will also require special care since wood is so absorbent. Brass is heavy so it is important to use a strong glue that works on wood as well as brass metal.
How To Prepare Brass To Wood
Brass does need preparation that starts with sanding the surface where glue is applied. Use medium-fine sandpaper from 500-grit and up to give brass enough surface texture for allowing the glue to adhere better. Wood is porous and doesn’t need more than a light scuffing to get any of these glues to stick well. Softer wood may present a surface where glue can soak in, so a pre-applied layer of glue will help to prevent over-saturation of wood that acts like a sponge.

How To Apply Glue To Brass To Wood
Whenever using super glue on wood, add a small layer onto the wood and spread this using a spatula all over the gluing surface. Allow this layer to dry first before attaching brass pieces onto its surface. Flat brass should have a layer of adhesive applied first and then attached to wood. If there is brass tubing is used, a light layer of super glue can tack down the brass tube. Then by using super glue and baking soda, gaps can be filled along the sides.
Superglue will soak into baking soda and cure instantly making it easy to fill the edges of brass tubes that are held in place. Epoxy will work similarly by mixing a bit of flour into the epoxy and spreading it along the edges of brass tubes. Any flat brass simply needs to have a spatula for applying the adhesive. Silicon can be squeezed onto a surface and then pressed flat using a spatula tool to clean up the excess.
How To Cure Glue Brass To Wood Glue
Super glue is the only adhesive here that doesn’t need much time for post-curing since it’s pressure-sensitive. Both epoxy and silicone will take 24 hours to totally cure in a warm room. Clamping is only needed when items are not totally flat and need to wrap around slightly curved or rounded edges. Using cloths pins or spring-loaded clamps will give the best results.
Which Is The Best Glue To Use And Why?
Anytime silicone and epoxy are used, these adhesives will provide the best adhesion for all long-term applications. Super glue is nice since it works fast and will glue brass onto wood quickly when the need for instant results. Super glue isn’t the best for rounded brass including tubing or extruded pieces unless fillers are added to hold them in place. Baking soda is a great choice for creating gap-fills with super glue.
Epoxy and silicone are also optimal if there is enough time to allow these adhesives to dry overnight.
We hope you found this guide on gluing wood and brass to one another useful, stay up to date with the latest glue guides by coming back soon. Feel free to contact us with any suggestions.

